- Downloads
- Sounds
- projects.esu.eu
- LokSound 5 North American & Australian factory Equipped Sound files
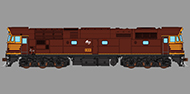
Athearn SD80MAC  H0 N XL L M4
- Article numbers:12447
- Last change: 7/16/2021
- Manufacturer: ESU

This file was made SPECIFCALLY for the Athearn SD80MAC and is function mapped for their lighting. This special mapping includes the "Pusher Lights" on F5
The SD80MAC is a 5000 horsepower C-C diesel-electric locomotive. The SD80MAC uses a 20 cylinder version of EMD's 710G prime mover,formally known as the V-20 710G3B-ES and is the first diesel locomotive to use a 20-cylinder engine since the SD45/SD45-2. The SD80MAC introduced a wide radiator housing similar to GE locomotives and the placement of dynamic brakes at the rear of the locomotive. Key spotting difference between the SD80MAC and SD90MAC include: no external rear sandbox on the 90MAC, rear number boards, and the placement of the front numberboards (above the cab windows on the SD80MAC, on the nose on most SD90MACs). The SD80MAC also has recessed red marker lights in the nose, an identifying feature unique to Conrail locomotives, although NS has removed the lights on most of their former Conrail engines.
We've tried to be as prototypical as possible with this iconic locomotive. Because of this, the notching on this SD80MAC file may be slightly different from what you are used to. Like many modern EMDs there is a warm-up cycle when you initially turn on the prime mover. This will cause the prime mover to rise and hold for a short period of time. There is also a high and low idle dictated by the isolation switch. If the isolation switch is not activated Notch 1 and Notch 2 are the same as this is high idle. Activating the islolation switch will drop the sounds to low idle.
Recorded from a EMD SD80MAC
This project is an isolation switch based low idle version. It has a single turbo late (silenced) exhaust stack.
File also contains a "low Idle" Mode on F15 when Standing Still.
Pressing F15 while not moving will lower the prime mover and lock the motor. F15 must be turned off to go to "regular idle" and begin moving.
Another Mode is "Reverser In Center Position". When pressing F24 while stopped, the motor will lock so you can throttle through the notches like the prototype in neutral. F24 must be turned off to begin moving.
This project has "Run 8" mode. When turning on F26 with F28 off, the prime mover goes to run 8. Turning off F26 returns the prime mover sounds back to normal mode.
This project has "Coast" mode. When turning on F27 with F28 off, the prime mover goes to idle for coasting purposes. Turning off F27 returns the prime mover sounds back to normal mode.
You can still use F26 and F27 for manual nothing. You have to keep both F26 and F27 off before pressing F28 to turn on manual notching. Once F28 is on, you can use F26 to notch up and F27 to notch down. F26, F27, and F28 must be turned off to return to normal mode.
This project has "Load" mode. When turning on F29 with F15, F24, F26, F27, F28 off, the prime mover goes into load mode. While you are using load mode, the prime mover will notch up 1 or more notches based on primary load settings(CV104). The throttle notches up using speed instead of requested speed while using the load feature. F29 must be turned off to return to normal mode.
This project has "DPU" mode. When turning on F5, the headlight and red marker lights activate on the end of the locomotive that is opposite from the direction of travel.
This file is also equipped with a Smart Start feature that cycles the prime mover on and off at intervals of your choice if the throttle is left at Idle and the loco is stopped.
Smart Start (Sound CV14):
CV168=0 No Smart Start Cycle - Default
CV168=1 - 3 Minute Cycle
CV168=2 - 6 Minute Cylcle
CV168=3 - 9 Minute Cylcle
CV168=4 - 12 Minute Cylcle
Etc.....
CV168=255 - 765 Minute Cycle
3rd Gen Horn Pack 1
Horns (SoundCV9):
CV163=0 Leslie S-3L-R
CV163=1 Leslie S-5T-RRO-R
CV163=2 Nathan K-2H
CV163=3 Nathan K-3H-L
CV163=4 Nathan K-3L
CV163=5 Nathan K-3LA
CV163=6 Nathan K-5HL
CV163=7 Nathan K-5H-R24
CV163=8 Nathan K-5L
CV163=9 Nathan K-5LA
CV163=10 Nathan K-5LA-R24
CV163=11 Nathan K-5L-LA
CV163=12 Nathan K-5L-R24
CV163=13 Nathan P-3
CV163=14 Nathan P-5-R24
CV163=15 Leslie RS-3L-RO
EMD 3rd Generation Bell Template Pack 2
Bells (SoundCV10):
CV164=0 EMD 8475495 Steel Bell 049
CV164=1 EMD 8475495 Steel Bell 066
CV164=2 EMD 8475495 Steel Bell 068
CV164=3 Graham-White E-Bell 006
CV164=4 Graham-White E-Bell 009
Auto Bell:
Many Second and Third Generation locomotives have been fitted with an Automatic Bell that is triggered when the horn is blown. In MANY cases this cannot even be bypassed on modern locos. Before the FRA mandated this feature on new locomotives the bell was of course turned on and off separately. Some locomotives were delivered with a manual bell and have been converted to an automatic bell. This creates a challenge in sound file creation.
We realize that not every loco with a particular prime mover had this feature. As such we have built in an option to turn the feature on and off. We will set the default in the file to be what is most appropriate for the particular file.
To turn the feature OFF - Auto Bell OFF:
1. Remove the Auto bell sound slot from the function mapping chart
CV31 = 16, CV32 = 8
----------------------
CV311 = 4
2. Change the sound configuration of the Auto bell sound slot
CV31 = 16, CV32 = 1
----------------------
CV287 = 0
To turn the feature ON - Auto Bell ON:
1. ADD the Auto bell sound slot from the function mapping chart
CV31 = 16, CV32 = 8
----------------------
CV311 = 12
2. Change the sound configuration of the Auto bell sound slot
CV31 = 16, CV32 = 1
----------------------
CV287 = 1
Auto Bell Timer:
The Bell timer is amount of time the bell will play after the horn if the auto timer is active. The timer is broken down into 1/4 of a second increments.
CV169=4 - 1 Second
CV169=8 - 2 Seconds
CV169=12 - 3 Seconds
CV169=16 - 4 Seconds
CV169=20 - 5 Seconds - Default
Etc...
3rd Gereration Brake Squeal Template Pack 1
Brake Squeal (SoundCV11)
CV165=0 Composition Shoe #1
CV166=1 Composition Shoe #2
EMD 3rd Generation Air Dryer Template Pack 1
Air Dryer (SoundCV12)
CV166=0 GP60 Air Dryer 1
CV166=1 SD60E Air Dryer 2
CV166=2 SD70M-2 Air Dryer 3
CV166=3 SD70MAC Air Dryer 4 Hide description more…
H0 N XL L M4
- Article numbers
- 12447
- Last change
- 7/16/2021
- Manufacturer
- ESU
GHB DD1 H0 N XL L M4
- Article numbers:99440
- Last change: 2/15/2021
- Manufacturer: GHB

PRR DD-1
GHB
The Pennsylvania Railroad DD1 was a class of boxcab electric locomotives built by the Pennsylvania Railroad. The locomotives were developed as part of the railroad's New York Tunnel Extension, which built the original Pennsylvania Station in New York City and linked it to New Jersey via the North River Tunnels. The Pennsylvania built a total of 66 locomotives in its Altoona Works; they operated in semi-permanently coupled pairs. Westinghouse supplied the electrical equipment.
Each semi-permanently coupled pair had a length of 64 feet 11 inches (19.8 m) and weighed 313,000 pounds (142,000 kg).[1] DD1-class locomotives were nearly always operated as a pair—never individually and rarely as two pairs in a double-heading configuration. The PRR classed their 4-4-0 locomotives as class D, and the DD1 was essentially two 4-4-0 locomotives coupled back to back, resulting in the new class, DD. Each pair was assigned a single "Electrified Zone Number" (EZN); the EZN simplified train dispatching for each pair of DD1s while their original individual serial numbers were used for the mechanical records of the locomotives.
Each locomotive had its own Westinghouse 315-A, direct current, commutating pole, electric motors within a monocoque cab. The motors had a continuous power rating of 1,580 horsepower (1,180 kW) at 58 miles per hour (93 km/h), and could produce up to 2,130 horsepower (1,590 kW) at 38 miles per hour (61 km/h) for no more than an hour. Their top speed was 85 miles per hour (137 km/h), but PRR/LIRR timetables had a speed limit of 65 miles per hour (105 km/h). The motors were connected to the two 72-inch (1,829 mm) drivers via a jackshaft and coupling rods. The design of the DD1 served as a transition between steam locomotives and modern electric locomotives. Despite their ungainly appearance, DD1s ran "quietly and smoothly...with no appreciable rod clanking", and had a very low maintenance cost. DD1 locomotives operated off of 650 volt direct current from a third rail.
This file has 3 selectable whistles
CV163 - 0
CV163 - 1
CV163 - 2 Hide description more…
H0 N XL L M4
- Article numbers
- 99440
- Last change
- 2/15/2021
- Manufacturer
- GHB
Auscision NR Class H0 N XL L M4
- Article numbers:95463
- Last change: 1/25/2021
- Manufacturer: Auscision

Equipped with ESU "FULL THROTTLE" features!
MUST use LokProgrammer Version 5.0.0 or newer
Auscision Models UGL GE NR Class Diesel Locomotive. GE 16 Cylinder 7FDL engine
Project Sound Features
When the Prime Mover Sound is first started it will run through a 'Cold' starting sequence of fuel priming and starting with the sound running to a High Idle condition. The Air Compressor will also start and run for a period during this sequence.
After a short period it will drop back to a Normal Idle speed which is also where the engine sound will initially revert too after running in power.
And finally the engine sound will drop to a Low Idle condition after remaining in Normal Idle for a period without moving.
With the Air Compressor randomly starting, the Low Idle sound will transition to Normal Idle during this time and drop back to Low Idle following the Compressor stopping.
Several Air Dryer sounds function randomly whilst the locomotive is running. These sounds will begin to function after starting and Normal Idle begins, and will then function continuously. The Air Dryer sounds also continue to function after the locomotive sound has stopped for a few minutes.
If the locomotive is restarted during the time the Air Dryers are still running it is considered a 'Warm' start and the engine will operate straight to a Normal Idle condition. With the completion of the Air Dryers after stopping the start process will revert to the 'Cold Start' sequence.
Throttle Notch Verse Engine RPM
The Prototype GE 16 cylinder 7FDL Engine in the NR Class locomotive performs with a lesser amount of set RPM settings as compared to earlier standard engines. Basically it shares some Engine RPM settings across multiple throttle notch settings as listed below.
Therefore with some throttle notch increases / decreases there is no change in engine RPM settings.
Low Idle = 330rpm Speed step = 0/28
Normal Idle = 440rpm Speed step = 0/28
High Idle = 580rpm Speed step = 0/28
Notch 1 = 440rpm Speed step = 1/28
Notch 2 = 580prm Speed step = 3/28
Notch 3 = 880rpm Speed step = 5/28
Notch 4 = 880rpm Speed step = 7/28
Notch 5 = 990rpm Speed step = 10/28
Notch 6 = 990rpm Speed step = 12/28
Notch 7 = 990rpm Speed step = 14/28
Notch 8 = 1050rpm Speed step = 16/28
Australian Horn Pack (Sound CV9)
CV163=0 Nathan Airchime P5
CV163=1 Nathan Airchime P5 (Mixed Cast)
CV163=2 RVB Hurricane 5 Chime Version 1
CV163=3 RVB Hurricane 5 Chime Version 2
CV163=4 RVB Hurricane Twin 5 Chime (Series 4 48 class)
CV163=5 RVB Hurricane 5 Chime (2 x V1/V2 Directional)
CV163=6 RVB Hurricane 3 Chime
CV163=7 Westinghouse Single A-B (Default)
CV163=8 Westinghouse Twin AA-BB Version 1
CV163=9 Westinghouse Twin AA-BB Version 2
CV163=10 Nathan Airchime M5
CV163=11 Leslie Supertyphon S5T Version 1
CV163=12 Leslie Supertyphon S5T Version 2
CV163=13 Leslie Supertyphon RS5T Version 1
CV163=14 Leslie Supertyphon RS5T Version 2
CV163=15 RVB Hurricane 5 Chime Version 3
CV163=16 Kockum Sonics 5 Chime (GE NR Class Locomotive) DEFAULT
CV163=17 Nathan Airchime K2 (EMD GT46C-ACe Locomotives)
CV163=18 Nathan Airchime K5UL-AU-LS (GE C43/44ACi Locomotives)
Brake Squeal (Sound CV11)
CV165=0 Composition Shoe 1
CV165=1 Composition Shoe 2 (DEFAULT)
Air Dryers (Sound CV12)
CV166 = 0 Air Dryers ON (DEFAULT)
CV166 = >=1 Air Dryers OFF
Ditch Lights.
Mapped to turn on with Function 1.
When turned on and the Horn is used the Lights will flash alternatively.
Default Setting for the Grade Control Holding Time CV132 = 174 for 11.4 seconds.
The Default flashing rate for the Ditch Lights is 1.5 seconds CV112 = 31.
Ditch Lights 'Off Condition' Grade Control On Timer (Sound CV15).
With the Ditch lights set to the off condition, and then using the Horn function, the Ditch Lights will function and flash, then extinguish once the flash cycle has completed.
Sound CV15 timer sets the Ditch Lights 'On Time' required. CV169 = 42. (Approximately the same 11.4 seconds of the Grade Control time)
Radiator Fan Mode (Sound CV16) Mapped to F13
CV170=0 Manual operation On/Off
CV170=1 Auto (DEFAULT) Auto condition, When F13 is turned on, the fan sound will activate at speed step 10 of 28 (Equivalent to Engine Notch 5) The fan sound remains active until the locomotive stops at speed step 0, and will cease after a short end timer completes. If the locomotive moves off again before the timer completes the fan sound will remain active.
Flange Squeal. Mapped to F20
When F20 active, sound will function from speed step 4 of 28 and above.
Manual Notching Function.
F11 (Coast Function Button) and F12 (Run 8 Function Button) also control a manual notching feature.
You have to keep both F11 and F12 off before activating F29 to turn on manual notching. Once F29 is on, you can use F12 to notch up and F11 to notch down. F11, F12, and F29 must be turned off to return to normal mode.
FULL THROTTLE features:
Drive Hold: Logic Function, Mapped to F3
Coast: Logic Function, Mapped to F11
Run 8: Logic Function, Mapped to F12
Independent Brake: Sound Slot 11, Mapped to F5
For more info please see the "Full Throttle" Quick Start Guide in the ESU Instruction Manual Section of our Website.
http://www.esu.eu/en/downloads/instruction-manuals/digital-decoders/
Hide description more…
H0 N XL L M4
- Article numbers
- 95463
- Last change
- 1/25/2021
- Manufacturer
- Auscision
Auscision B Class H0 N XL L M4
- Article numbers:11468
- Last change: 1/25/2021
- Manufacturer: Auscision

Equipped with ESU "FULL THROTTLE" features!
MUST use LokProgrammer Version 5.0.0 or newer
Auscision Models VR B Class Diesel Locomotive. EMD ML2 16 Cylinder 567BC
FULL THROTTLE features:
Drive Hold: Logic Function, Mapped to F3
Coast: Logic Function, Mapped to F11
Run 8: Logic Function, Mapped to F12
Independent Brake: Sound Slot 11, Mapped to F5
Engine Cold/Warm Start Feature.
When the Prime Mover Sound is first started it will run through a cold sequence of fuel priming before a sluggish engine crank and start. The air compressor will also start and run for a short time during this sequence.
If the Engine is shut down and restarted immediately, as in a warm start, then no fuel prime occurs, the engine cranks and starts a lot quicker, with no air compressor.
Reverts to Cold Start following engine shut down and after a 60 second timer.
Australian Horn Pack (Sound CV9)
CV163=0 Nathan Airchime P5
CV163=1 Nathan Airchime P5 (Mixed Cast)
CV163=2 RVB Hurricane 5 Chime Version 1
CV163=3 RVB Hurricane 5 Chime Version 2
CV163=4 RVB Hurricane Twin 5 Chime (Series 4 48 class)
CV163=5 RVB Hurricane 5 Chime (2 x V1/V2 Directional)
CV163=6 RVB Hurricane 3 Chime
CV163=7 Westinghouse Single A-B (Default)
CV163=8 Westinghouse Twin AA-BB Version 1
CV163=9 Westinghouse Twin AA-BB Version 2
CV163=10 Nathan Airchime M5
CV163=11 Leslie Supertyphon S5T Version 1
CV163=12 Leslie Supertyphon S5T Version 2
CV163=13 Leslie Supertyphon RS5T Version 1
CV163=14 Leslie Supertyphon RS5T Version 2
CV163=15 RVB Hurricane 5 Chime Version 3
Brake Squeal (Sound CV11)
CV165=0 Composition Shoe
CV166=1 Cast Iron Shoe (Default)
Handbrake (Sound CV15) Mapped to F19
CV169=0 Wheel Handbrake (Default)
CV169=1 Ratchet Handbrake
Handbrake F19 will only function from a stationary condition.
Once active, Locomotive will only be able to move at a slow restricted maximum speed with brake squeal enabled. Turning off F19 locomotive will return to normal operating condition.
Radiator Fan Mode (Sound CV16) Mapped to F13
CV170=0 Manual operation On/Off
CV170=1 Auto (Default) Auto condition, When F13 is turned on, the fan sound will activate at speed step 12 of 28 (Equivalent to Engine Notch 6) The fan sound remains active until the locomotive stops at speed step 0, and will cease after a short end timer completes. If the locomotive moves off again before the timer completes the fan sound will remain active.
Flange Squeal. Mapped to F20
When F20 active, sound will function from speed step 4 of 28 and above.
Manual Notching Function.
F11 (Coast Function Button) and F12 (Run 8 Function Button) also control a manual notching feature.
You have to keep both F11 and F12 off before activating F29 to turn on manual notching. Once F31 is on, you can use F12 to notch up and F11 to notch down. F11, F12, and F29 must be turned off to return to normal mode.
For more info please see the "Full Throttle" Quick Start Guide in the ESU Instruction Manual Section of our Website.
http://www.esu.eu/en/downloads/instruction-manuals/digital-decoders/ Hide description more…
H0 N XL L M4
- Article numbers
- 11468
- Last change
- 1/25/2021
- Manufacturer
- Auscision
SXT Dash 9-44CW H0 N XL L M4
- Article numbers:97692.3, 97692.4, 97692.5
- Last change: 11/4/2020
- Manufacturer: ScaleTrains

LokPilot 5 DCC 59629
Made for SXT Dash 9
Made for the ScaleTrains GE DASH 9-44CW
97692.3 Flashing Ditch Lights
97692.4 Non Flashing Ditch Lights
97692.5 Non Flashing Ditch Lights with CN DPU light
Make sure if adding to a DC model that BOTH Dip-switches on the motherboard are switched to the ON Position.
In the Mid 1980s GE changed it's 16cyl FDL design to include a different exhaust silencer, a new electric compressor often known as the "Whoop compressor" and changed some of the electronics of their locomotives. These differences among a few other led to a distinct change in the sounds from the GE 16cyl FDL often found from the U25Bs on through the Dash-7 series of the Locomotives.
Keeping in tradition with GE's locomotive series nicknames beginning with the "Dash 7" of the 1970s, the C44-9W was dubbed the Dash 9 upon its debut in 1993.
The "Dash-9" GE 16-7FDL16Y2 Prime mover can be found in the following Locos:
Dash 9-40C, Dash 9-40CW, Dash 9-44CW, C44-9WL, C44-9WM
It is also very close to the following locos:
AC44C6M, AC44C4M, Dash 8-39B, Dash 8 40-B, Dash 8-40BW, Dash 8-39C, Dash 8-40C, Dash 8-40CM, Dash 8-40CW, Dash 8-41CW, Dash 8-44CW, C38EMi, C38AChe, AC4400CW
Some AC6000CW were built with 7FDL-16cyls and were later converted to 7HDL-16cyl. Some were never converted. Please refer to the prototype for reference.
Hide description more…
H0 N XL L M4
- Article numbers
- 97692.3, 97692.4, 97692.5
- Last change
- 11/4/2020
- Manufacturer
- ScaleTrains
SXT Dash 9-44CW H0 N XL L M4
- Article numbers:97492.1, 97492.2, 97492.3, 97492.4, 97492.5
- Last change: 11/3/2020
- Manufacturer: ScaleTrains
Made for the ScaleTrains GE DASH 9-44CW
97492.1 ATSF
97492.2 BNSF, UP
97492.3 NS C44-9W
97492.4 NS C40-9 "Top Hat"
97492.5 SP
In the Mid 1980s GE changed it's 16cyl FDL design to include a different exhaust silencer, a new electric compressor often known as the "Whoop compressor" and changed some of the electronics of their locomotives. These differences among a few other led to a distinct change in the sounds from the GE 16cyl FDL often found from the U25Bs on through the Dash-7 series of the Locomotives.
Keeping in tradition with GE's locomotive series nicknames beginning with the "Dash 7" of the 1970s, the C44-9W was dubbed the Dash 9 upon its debut in 1993.
The "Dash-9" GE 16-7FDL16Y2 Prime mover can be found in the following Locos:
Dash 9-40C, Dash 9-40CW, Dash 9-44CW, C44-9WL, C44-9WM
It is also very close to the following locos:
AC44C6M, AC44C4M, Dash 8-39B, Dash 8 40-B, Dash 8-40BW, Dash 8-39C, Dash 8-40C, Dash 8-40CM, Dash 8-40CW, Dash 8-41CW, Dash 8-44CW, C38EMi, C38AChe, AC4400CW
Some AC6000CW were built with 7FDL-16cyls and were later converted to 7HDL-16cyl. Some were never converted. Please refer to the prototype for reference.
Recorded from a GE CW40-9
This project has an automatic low & high idle. It has a single late (silenced) exhaust stack.
File also contains an "Isolation Switch" Mode on F15 when Standing Still.
Pressing F15 while not moving will lower the prime mover and lock the motor. F15 must be turned off to begin moving.
Another Mode is "Reverser In Center Position". When pressing F24 while stopped, the motor will lock so you can throttle through the notches like the prototype in neutral. F24 must be turned off to begin moving.
This project has "Run 8" mode. When turning on F26 with F28 off, the prime mover goes to run 8. Turning off F26 returns the prime mover sounds back to normal mode.
This project has "Coast" mode. When turning on F27 with F28 off, the prime mover goes to idle for coasting purposes. Turning off F27 returns the prime mover sounds back to normal mode.
You can still use F26 and F27 for manual nothing. You have to keep both F26 and F27 off before pressing F28 to turn on manual notching. Once F28 is on, you can use F26 to notch up and F27 to notch down. F26, F27, and F28 must be turned off to return to normal mode.
This project has "Load" mode. When turning on F29 with F15, F24, F26, F27, F28 off, the prime mover goes into load mode. While you are using load mode, the prime mover will notch up 1 or more notches based on primary load settings(CV104). The throttle notches up using speed instead of requested speed while using the load feature. F29 must be turned off to return to normal mode.
This file is also equipped with a Smart Start feature that cycles the prime mover on and off at intervals of your choice if the throttle is left at Idle and the loco is stopped.
Smart Start (Sound CV14):
CV168=0 No Smart Start Cycle - Default
CV168=1 - 3 Minute Cycle
CV168=2 - 6 Minute Cylcle
CV168=3 - 9 Minute Cylcle
CV168=4 - 12 Minute Cylcle
Etc.....
CV168=255 - 765 Minute Cycle
3rd Gen Horn Pack 1
Horns (SoundCV9):
CV163=0 Leslie S-3K-R
CV163=1 Leslie S-3L
CV163=2 Nathan K-3HA
CV163=3 Nathan K-3LA-R2
CV163=4 Nathan K-5H-R24
CV163=5 Nathan K-5LA-R24
CV163=6 Nathan P-3 Old Cast
CV163=7 Nathan P-3-R1
CV163=8 Nathan P-5-R24
CV163=9 Nathan P-5-R24 Old Cast
GE Modern Bell Template Pack 1
Bells (SoundCV10):
CV164=0 GE M 6731022A Steel Bell 001
CV164=1 GE M 6731022A Steel Bell 003
CV164=2 GE M 6731022A Steel Bell 005
CV164=3 GE M 6731022A Steel Bell 007
CV164=4 GE M 6731022A Steel Bell 035
CV164=5 Graham-White E-Bell 001
CV164=6 Graham-White E-Bell 003
CV164=7 Graham-White E-Bell 005
CV164=8 Graham-White E-Bell 007
CV164=9 Transtronic E-Bell 001
Auto Bell:
Many Second and Third Generation locomotives have been fitted with an Automatic Bell that is triggered when the horn is blown. In MANY cases this cannot even be bypassed on modern locos. Before the FRA mandated this feature on new locomotives the bell was of course turned on and off separately. Some locomotives were delivered with a manual bell and have been converted to an automatic bell. This creates a challenge in sound file creation.
We realize that not every loco with a particular prime mover had this feature. As such we have built in an option to turn the feature on and off. We will set the default in the file to be what is most appropriate for the particular file.
To turn the feature OFF - Auto Bell OFF:
1. Remove the Auto bell sound slot from the function mapping chart
CV31 = 16, CV32 = 8
----------------------
CV311 = 4
2. Change the sound configuration of the Auto bell sound slot
CV31 = 16, CV32 = 1
----------------------
CV287 = 0
To turn the feature ON - Auto Bell ON:
1. ADD the Auto bell sound slot from the function mapping chart
CV31 = 16, CV32 = 8
----------------------
CV311 = 12
2. Change the sound configuration of the Auto bell sound slot
CV31 = 16, CV32 = 1
----------------------
CV287 = 1
Auto Bell Timer:
The Bell timer is amount of time the bell will play after the horn if the auto timer is active. The timer is broken down into 1/4 of a second increments.
CV169=4 - 1 Second
CV169=8 - 2 Seconds
CV169=12 - 3 Seconds
CV169=16 - 4 Seconds
CV169=20 - 5 Seconds - Default
Etc...
3rd Gereration Brake Squeal Template Pack 1
Brake Squeal (SoundCV11)
CV165=0 Composition Shoe #1
CV166=1 Composition Shoe #2
GE Modern Air Dryer Template Pack 1
Air Dryer (SoundCV12)
CV166=0 AC4400CW Air Dryer 1
CV166=1 AC4400CW Air Dryer 2
CV166=2 AC4400CW Air Dryer 3
CV166=3 E4C6T Air Dryer 1 Hide description more…
H0 N XL L M4
- Article numbers
- 97492.1, 97492.2, 97492.3, 97492.4, 97492.5
- Last change
- 11/3/2020
- Manufacturer
- ScaleTrains
Auscision 422 Class H0 N XL L M4
- Article numbers:97420
- Last change: 2/3/2020
- Manufacturer: Auscision Models

Equipped with ESU "FULL THROTTLE" features!
MUST use LokProgrammer Version 5.0.0 or newer
Auscision Models NSW 422 Class Diesel Locomotive
There are up to 16 separate horns included on this one sound profile! All changeable using seperate CVs.
There are 2 separate Engine Prime Mover files also changeable using seperate CVs
Prime Mover:
CV31=16 CV32=8 CV407=1 EMD 16-645E V1
CV31=16 CV32=8 CV407=2 EMD 16-645E V3
Horns: (SoundCV9)
CV163=0 Australian Nathan P5
CV163=1 RVB Hurricane 3 Chime
CV163=2 RVB Hurricane 5 Chime
CV163=3 Twin RVB Hurricane 5 Chime
CV163=4 Nathan Old Cast P5
CV163=5 Westinghouse Single A-B
CV163=6 Nathan M5
CV163=7 RVB Hurricane 5 Chime V2
CV163=8 Directional RVB Hurricane 5 Chime (Default)
CV163=9 Nathan M3
CV163=10 Leslie RS3K
CV163=11 Nathan K5H
CV163=12 Leslie S2M
CV163=13 Nathan M3H
CV163=14 Wabco AABB #1
CV163=15 Wabco AABB #2
FULL THROTTLE features:
Drive Hold: Sound Slot 4, Mapped to F3
Run 8: Sound Slot 20, Mapped to F12
Coast: Sound Slot 21, Mapped to F11
Independent Brake: Sound Slot 11, Mapped to F5
For more info please see the "Full Throttle" Quick Start Guide in the ESU Instruction Manual Section of our Website.
http://www.esu.eu/en/downloads/instruction-manuals/digital-decoders/ Hide description more…
H0 N XL L M4
- Article numbers
- 97420
- Last change
- 2/3/2020
- Manufacturer
- Auscision Models
Auscision 80 Class H0 N XL L M4
- Article numbers:97419
- Last change: 1/6/2020
- Manufacturer: Auscision
Equipped with ESU "FULL THROTTLE" features!
MUST use LokProgrammer Version 5.0.0 or newer
Auscision Models NSWGR 80 Class Diesel Locomotive
ALCo 12 Cylinder 251CE
Australian Horn Pack (Selectable using SoundCV9):
CV163=0 Nathan Airchime P5
CV163=1 Nathan Airchime P5 (Mixed Cast)
CV163=2 RVB Hurricane 5 Chime (Version 1)
CV163=3 RVB Hurricane 5 Chime (Version 2)
CV163=4 Twin RVB Hurricane 5 Chime
CV163=5 RVB Hurricane 5 Chime (Version1/2 Directional-Forward/Reverse)
CV163=6 RVB Hurricane 3 Chime
CV163=7 Westinghouse Single A-B
CV163=8 Westinghouse Twin A-B (Version 1)
CV163=9 Westinghouse Twin A-B (Version 2)
CV163=10 Nathan Airchime M5
CV163=11 Leslie Supertyphon S5T (Version 1)
CV163=12 Leslie Supertyphon S5T (Version 2)
CV163=13 Leslie Supertyphon RS5T (Version 1)
CV163=14 Leslie Supertyphon RS5T (Version 2)
Brake Squeal (SoundCV11)
CV165=0 Composition Shoe
CV166=1 Cast Iron Shoe
FULL THROTTLE features:
Drive Hold: Logic Function, Mapped to F3
Coast: Logic Function, Mapped to F11
Run 8: Logic Function, Mapped to F12
Independent Brake: Sound Slot 11, Mapped to F5
Manual Noching Function.
F11 (Coast Function Button) and F12 (Run 8 Function Button) also control a manual notching feasture.
You have to keep both F11 and F12 off before pressing F31 to turn on manual notching. Once F31 is on, you can use F12 to notch up and F11 to notch down. F11, F12, and F31 must be turned off to return to normal mode.
Hide description more…
H0 N XL L M4
- Article numbers
- 97419
- Last change
- 1/6/2020
- Manufacturer
- Auscision
Turbine-B Unit MQ H0 N XL L M4
- Article numbers:93426.2
- Last change: 12/11/2019
- Manufacturer: Scale Trains

ScaleTrains.com
Big Blow Turbine B Unit
Museum Quality Version ONLY.
This file is for a LokSound V5 decoder. It was made to be used in tandem with LokSound V5 file 93426.1 (Scale Trains Museum Quality Turbine A Unit)
This file WILL NOT work in Rivet Counter Scale Trains Turbines.
H0 N XL L M4
- Article numbers
- 93426.2
- Last change
- 12/11/2019
- Manufacturer
- Scale Trains
SXT Turbine A Unit H0 N XL L M4
- Article numbers:93426.1
- Last change: 12/11/2019
- Manufacturer: Scale Trains
Scale Trains
Big Blow Turbine A Unit
Museum Quality Version ONLY
CV163 & CV164 Sound Options/ Alternate Horns and Bells
Your New Turbine will come to you with the Correct Leslie S5T-RF Horn and GE Bell right out of the box. But in case you would like to hear a different horn or bell sound we have provided an assortment.
Horns (SoundCV9):
CV163=0 Dual Leslie A200
CV163=1 Nathan K3L
CV163=2 Nathan M5
CV163=3 Nathan P3
CV163=4 Nathan Old Cast P5A
CV163=5 Leslie S2M
CV163=6 Leslie RS3L
CV163=7 Leslie S3L
CV163=8 Leslie S5T
CV163=9 Nathan M3
CV163=10 Leslie RS3K
CV163=11 Nathan K5H
CV163=12 Leslie S3LR
CV163=13 Nathan M3H
CV163=14 Leslie Dual A125-A200
CV163=15 Leslie S5T-RF *Default*
Bells (SoundCV10):
CV164=0 EMD Air Bell
CV164=1 GE Air Bell *Default* Hide description more…
H0 N XL L M4
- Article numbers
- 93426.1
- Last change
- 12/11/2019
- Manufacturer
- Scale Trains
License Agreement
1. GRANT OF LICENSE
1.1 ESU grants you a non-transferable, limited, non-exclusive right to use the Content solely for your own personal purposes. You may load the Content into RAM, as well as installation on a hard disk or other storage device on a single computer, hardware product or mobile device owned by you or under your control. The installation process may result in a copy of the Content residing on your computer, in which case, you may retain one (1) copy of the Content on your computer, provided that you retain all copyright and other proprietary notices on the copy and the copy is kept in your possession with the original.1.2 By using the Content, you shall not obtain any ownership, copyright, proprietary or other interest in or to the Content. The Content is licensed, not sold.
1.3 You are licensed to use, modify and combine the Sound Samples with sound samples provided by third parties, to create your own sound compositions which, subject to you complying with the terms of this Agreement, you are free to distribute as you wish provided that: (i) the Sound Samples have been mixed together to create an original work; (ii) individual Sound Samples are not used in isolation and (iii) the Sound Samples or derivatives are not used to create sound libraries for distribution to third parties.
2. PROHIBITED USES
Neither you, nor anyone at your direction, shall:2.1 use the Content, or any part of it, for any public performance, live broadcast or time delayed live broadcast where the Content is used unattended for commercial purposes without ESU' s prior written consent;
2.2 use the Content, or any part of it, in any competitive product;
2.3 sub-license, copy, reproduce, transmit, assign, rent, sell, lease, offer on a pay-per-play basis, distribute for money or any other consideration, or commercially exploit in any other manner or through any medium whatsoever or otherwise transfer in any way the Content or any part thereof;
2.4 manufacture and/or distribute for money or otherwise commercially exploit any product that incorporates any part of the Content. If you wish to use any part of the Content for manufacture, resale, sub-license or further distribution, you must contact ESU (and where relevant, its licensors) to enter into an appropriate agreement with ESU (and, where relevant, its licensors);
2.5 publish the results of any analysis or comparative evaluation of the Content or any part thereof without ESU' s prior written consent;
2.6 reverse engineer, recompile or disassemble any part of the Content except to the extent and in the circumstances expressly permitted by ESU and its licensors in writing or by law;
3. INTELLECTUAL PROPERTY RIGHTS
You acknowledge that all intellectual property rights in the Content are and shall remain vested in ESU and its licensors. You undertake not to interfere with or diminish, whether by act or omission, the rights, title and interest in the Content of ESU and its licensors. You may be held responsible by ESU and/or any of its licensors for any infringement of any intellectual property rights in the Content. For the avoidance of doubt, provided that you comply with the terms of this Agreement, ESU shall not claim ownership of the intellectual property rights in any compositions created by your use of the Content.4. TERM AND TERMINATION
This Agreement is effective from the first date you install the Content. The rights granted to you under this Agreement shall terminate if you fail to abide by its terms. Upon such termination you agree to destroy the Content including any Content stored on the hard disk of any computer under your control. You may terminate this Agreement at any time by destroying or erasing all your copies of the Content. Any termination of this Agreement (howsoever occasioned) shall not affect any accrued rights or liabilities of you or ESU nor shall it affect the coming into force or the continuance in force of the provisions of Clauses 2, 3, 5 and 6 and any provision hereof which is by implication intended to come into or continue in force on or after such termination.5. NO WARRANTIES
TO THE MAXIMUM EXTENT PERMITTED BY APPLICABLE LAW, ESU AND ITS LICENSORS PROVIDE THE CONTENT "AS IS" AND ESU EXCLUDES ON BEHALF OF ITSELF AND ITS LICENSORS, ALL CONDITIONS, TERMS, REPRESENTATIONS (OTHER THAN FRAUDULENT REPRESENTATIONS) AND WARRANTIES RELATING TO THE CONTENT, WHETHER IMPOSED BY STATUTE OR BY OPERATION OF LAW OR OTHERWISE, INCLUDING BUT NOT LIMITED TO, IMPLIED WARRANTIES OF SATISFACTORY QUALITY AND FITNESS FOR A PARTICULAR PURPOSE. NEITHER ESU NOR ITS LICENSORS WARRANT THAT THE OPERATION OF THE CONTENT WILL BE UNINTERRUPTED, ERROR FREE, VIRUS FREE OR MEET YOUR SPECIFIC REQUIREMENTS. YOU MAY HAVE OTHER RIGHTS THAT VARY FROM JURISDICTION TO JURISDICTION.6. ESU's LIABILITY
Neither ESU nor its licensors shall have any liability to you for any loss or damage caused directly or indirectly in connection with the Content, any part thereof or this Agreement, except to the extent that such liability cannot be lawfully excluded. In any case, neither ESU nor its licensors shall be liable for any loss of business, data, profits, savings, or any other special, incidental, consequential, indirect or economic loss whatsoever even if such losses were contemplated at the date of this Agreement.7. GENERAL
7.1 You acknowledge that damages alone might be insufficient remedy for any breach of the terms of this Agreement and that the remedies of injunction, specific performance or other equitable relief would be suitable remedies in the event of any breach or threatened breach of this Agreement.7.2 You may not assign or otherwise transfer all or any part of this Agreement or the rights granted to you hereunder.
7.3 ESU is not obliged to provide any maintenance, technical support or upgrades to you.
7.4 You agree to comply with all applicable import and export regulations and acknowledge that you have the responsibility for obtaining all necessary licenses to export, re-export, transfer or import the Content.
7.5 This Agreement constitutes the entire agreement between you and ESU with respect to the subject matter hereof and supersedes all prior agreements, arrangements and understandings between the parties and constitutes the entire agreement between the parties relating to such subject matter hereof. No addition to or modification of any provision of this Agreement shall be binding upon ESU and you unless made by a written instrument signed by a duly authorized representative of ESU and you.
7.6 No forbearance, delay or indulgence by either party in enforcing the provisions of this Agreement shall prejudice or restrict the rights of that party nor shall any waiver of its rights operate as a waiver of any subsequent breach and no right, power or remedy herein conferred upon or reserved for either party is exclusive of any other right, power or remedy available to that party and each such right, power or remedy shall be cumulative.
7.7 Notwithstanding that the whole or any part of any provision of this Agreement may prove to be illegal or unenforceable the other provisions of this Agreement and the remainder of the provision in question shall remain in full force and effect.
If you download the designated file, you agree to be legally bound by the license given above.